Git integration
RCode has some Git integration. This mainly covers the file explorer and a user-friendly interface for seeing and commit changes to your remote repository.
Prerequisites
Git should be installed on your computer to allow the Git integration in RCode. This steps depends on your operating system:
- For Windows, download the official build on https://git-scm.com/download/win ;
- For MacOS, most MacOS versions come with Git already installed ;
- For Linux, this depends on your distribution. For example,
apt-get install gitwill install it for Debian and Ubuntu based distributions.
About Github Desktop
Please note that installing Github Desktop will not work. Installing Github Desktop will make authentication a lot easier, but you will still have to install Git manually, this is because Github Desktop now ships a custom Git build1.
Warning
You might have to restart RCode after installing Git to make it work.
Setting up Git
You can either create a repository in a folder, or clone an existing remote repository.
Danger
It is highly recommended to first create your remote repository (on Github, Gitlab, Azure, etc.) and then clone it, rather than creating an empty folder for publishing it later.
Cloning an existing repository
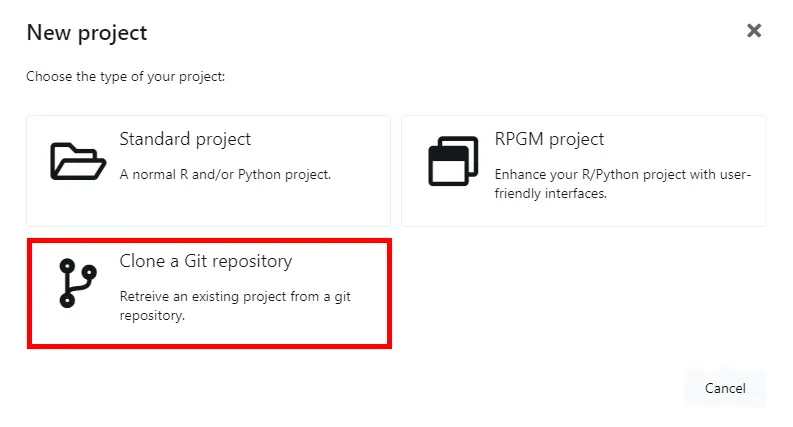
By creating a new project with File then New project..., you can choose Clone a Git repository.
You can then enter the URL of the remote repository. For example with Github, it
should be in the form https://github.com/username/repository.git.
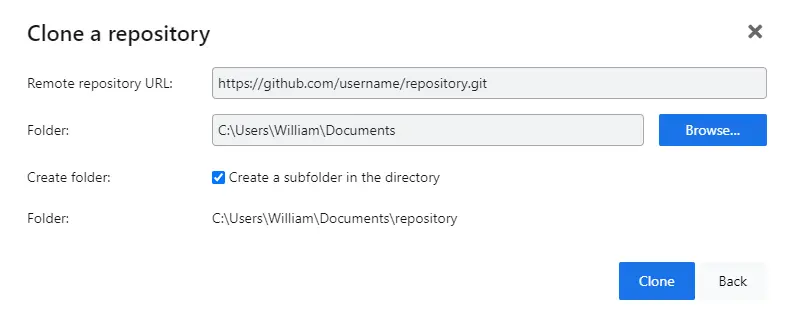
Please note that Git will probably require that you login to allow access to the repository.
Creating a new repository
If you already have a folder with some files in it, you can still create a local Git repository to track your changes.
If you want to publish your project to a remote server, you will have to manually configure the remote URL, please refer to your Git host and the Git command line options to do this.
Using Git in RCode
File explorer
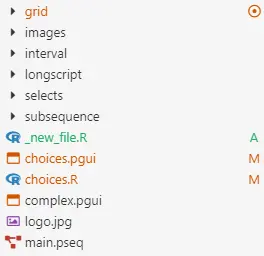
In the File explorer, you can see which files are added (green) or modified (orange). The parent folders are also colored depending on the changes in their files.
Git management
You can open the Git management screen by going in the top main menu in Code then Git control version..., or with Ctrl+Shift+G
The interface is separated in three main parts:
- The top menu, with a button to manage branches and a main action button for fetch, pushing or pulling changes with the remote repository ;
- The left sidebar, for displaying either the current changes to your codebase or the log history of the reporitory ;
- The main section which depends on what is selected in the sidebar.
Commit
When selecting Changes in the sidebar, it display all the files that have been added, modified or deleted in a list.
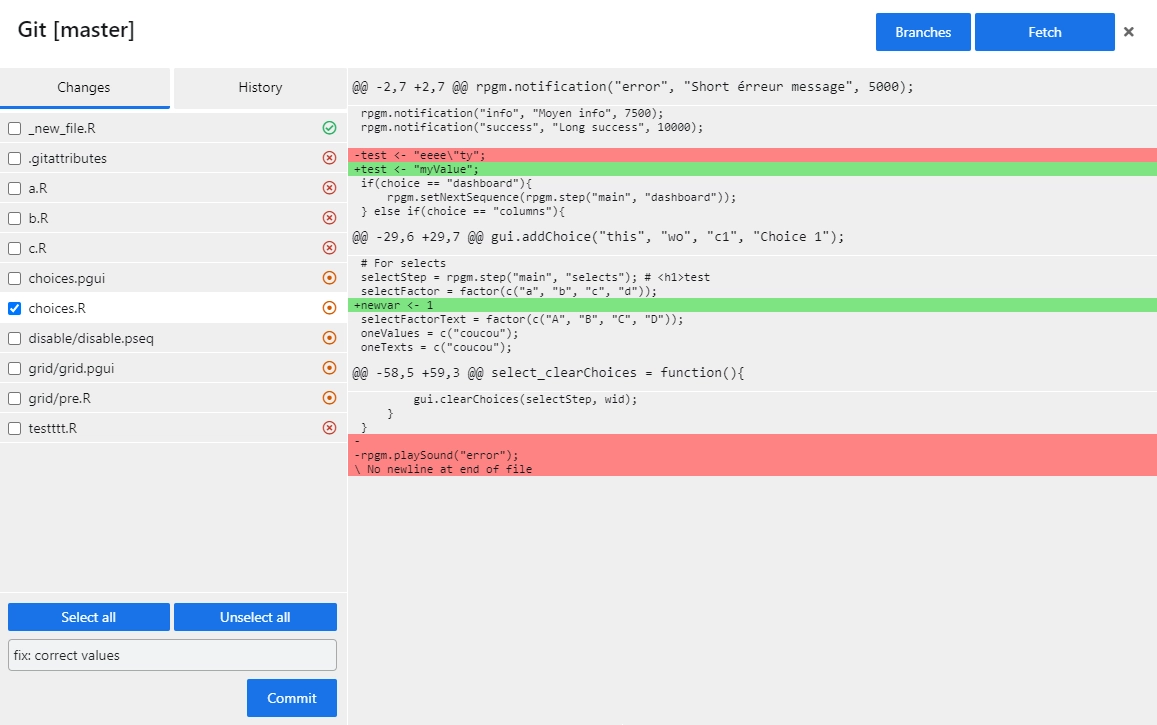
You can click on a file in the list to see all the changes made in this file. New lines are in green and removed lines are in red. You can then select which new, modified or removed files you want to include in your commit by clicking on the checkbox on the left of each file. You can also select or unselect all files at once with the two buttons on the bottom.
After writing a commit message, you can press Commit, which will locally commit your changes. If you have a remote URL configured, you can then Push your changes with the main top button.
Log
You can see all the modifications made to the repository by clicking on the History top button in the sidebar on the left.
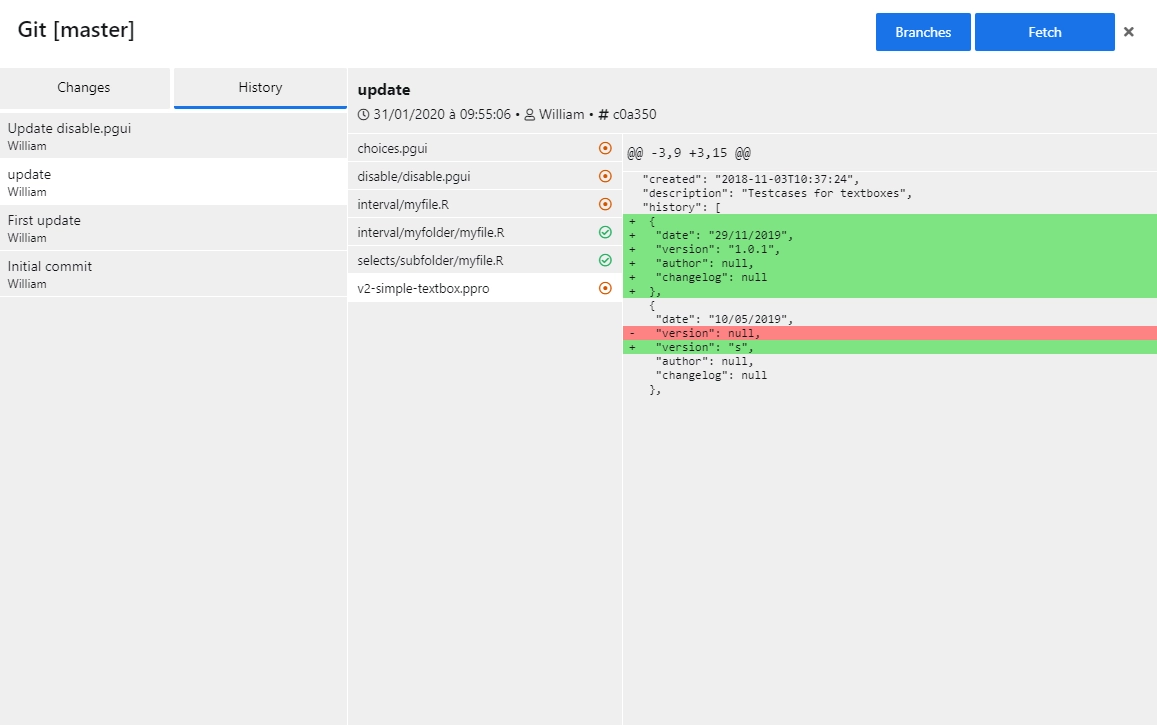
You can then click on a commit on the left, this will show all the details and all the files modified by this commit. Clicking on a file in the list will show a diff view with all the changes made on this file.
Branches
It is possible to manage branches by clicking on the Branches button in the top menu on the right.
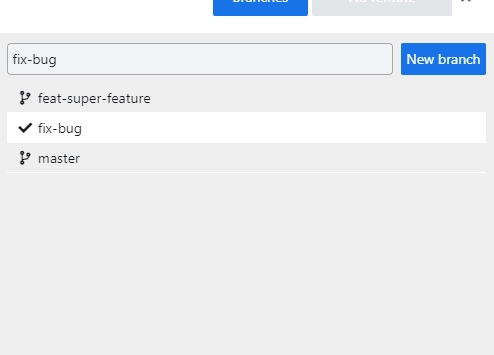
Here, you can see all the remote and local branches in the repository. By clicking on a branch, you switch all your code to this branch. You can also create a branch by typing a name on the top and clicking New branch. Finally, you can delete branches by right-clicking on an existing branch.
-
The custom Git provided by Github Desktop is available at https://github.com/desktop/dugite-native. ↩