Javascript tutorial
Introduction
With this tutorial, you will learn to use the Javascript (JS for short) functions of RPGM and control the client-side Javascript part of an app. We will create a project with a leaflet map to an RPGM app. Leaflet is a customizable and interactive map, like Google maps. R will be able to change the map and also get notified if the user click somewhere on the map.
Why use JavaScript
Javascript is a simple programming language which is mainly used on websites, and is also behind the interface of RPGM. Using Javascript will allow you to use the vast Javascript ecosystem, mainly for its custom widgets.
Creating the project
Launch RCode and create a new RPGM project.
Adding leaflet
The first step if to download Leaflet. Head into the official website, and click on Download, then on the latest version available, which is 1.9.4 at the time of writing this tutorial. Please note that every Javascript library works differently. For Leaflet, it is shipped as a zip file that should be decompressed.
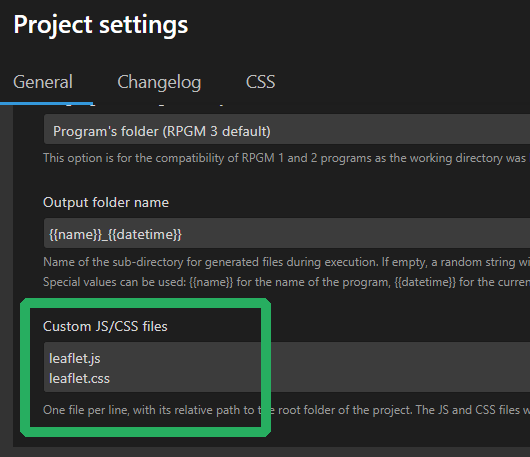
In the leaflet zip file, take the leaflet.js and leaflet.css files and copy/paste them in your project folder. Open the ppro file of your project and find the Custom JS/CSS files section. Add two new lines: leaflet.js and leaflet.css.

Info
Javascript and CSS files will be loaded in the same order as written in the ppro setting. If some Javascript libraries need some dependencies, add the dependencies first.
Leaflet is now added in your project and will be loaded with your app.
Creating the widget
Create a new gui file and name it main.pgui. Add a new label and write Leaflet JS/R example.
Then add a new label widget and write in its value: <div id="map"></div>. This will create an HTML div with the id map, which leaflet will need.

Initializing Leaflet
Currently, Leaflet is added in the app, and an empty HTML div is added to a GUI. Leaflet now needs to be initialized as described in the Leaflet documentation.
Create a new file named main.js: this will be our main Javascript file.
It will be executed only on the client-side of RPGM. Let's create a simple initializeMap function:
function initializeMap(){
const mapInstance = L.map('map');
mapInstance.setView([51.505, -0.09], 13);
const tiles = L.tileLayer('https://tile.openstreetmap.org/{z}/{x}/{y}.png', {
maxZoom: 19,
attribution: '© <a href="http://www.openstreetmap.org/copyright">OpenStreetMap</a>'
}).addTo(mapInstance);
}
This function will create a default map zoomed on a London district. The map part
of the L.map('map') line is the ID of our HTML div, which is correctly map.
But when to call this Javascript function? There is two cases:
- The map should be initialized when the user enter the correct GUI ;
- The map should be initialized when the user connect directly to the GUI or if race conditions occurs.
About race conditions
Race conditions is when things might doesn't happen in the order they are supposed to. Here, the custom JS scripts take some times to load, and during this time, the app, R and Python continues to run. This is because Javascript loads its code asynchronously, that's how internet browsers work.
To detect when the user enter the GUI, we can use a Javascript RPGM event called didEnterStep.
Add to your Javascript file:
But, how to know in which step or GUI the user just got in? A JS function called RPGM.getCurrentStepId() will
return the step ID defined in your project sequence of the current step.
Modify the script to check if the user is correctly in the GUI:
function initializeMap(){
// Stop if the user is not in the correct GUI
if(RPGM.getCurrentStepId() !== 'leaflet'){
return;
}
// Initialize map
const mapInstance = L.map('map');
mapInstance.setView([51.505, -0.09], 13);
const tiles = L.tileLayer('https://tile.openstreetmap.org/{z}/{x}/{y}.png', {
maxZoom: 19,
attribution: '© <a href="http://www.openstreetmap.org/copyright">OpenStreetMap</a>'
}).addTo(mapInstance);
}
RPGM.on('didEnterStep', initializeMap); // Function called when entered a new step
Here, we will have to set the ID of the GUI to leaflet in the sequencer.
One last thing, is the race condition. The script MIGHT miss the didEnterStep event, if the event
is fired BEFORE your script finished its initialization. That's why we have to do two more things:
- Call
initializeMap()directly ; - Check we don't call it two times if we initialized it first. For that, we
will move the
mapInstancevariable to the globalwindowobject and initialize it withnull.
The final script is:
window.mapInstance = null;
function initializeMap(){
// Stop if the user is not in the correct GUI
if(RPGM.getCurrentStepId() !== 'leaflet'){
return;
}
// Stop if already initialized
if(window.mapInstance !== null){
return;
}
// Initialize map
window.mapInstance = L.map('map');
window.mapInstance.setView([51.505, -0.09], 13);
const tiles = L.tileLayer('https://tile.openstreetmap.org/{z}/{x}/{y}.png', {
maxZoom: 19,
attribution: '© <a href="http://www.openstreetmap.org/copyright">OpenStreetMap</a>'
}).addTo(window.mapInstance);
}
RPGM.on('didEnterStep', initializeMap); // Function called when entered a new step
initializeMap();
Finishing the project
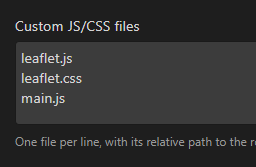
Do not forget to add main.js in the Custom JS/CSS files setting of the ppro:

Edit the default sequence to add the GUI with leaflet and an end step:

Also, the Leaflet documentation says the HTML div need a defined height, so head to
the CSS tab of the project file and add #map {height: 500px;}:

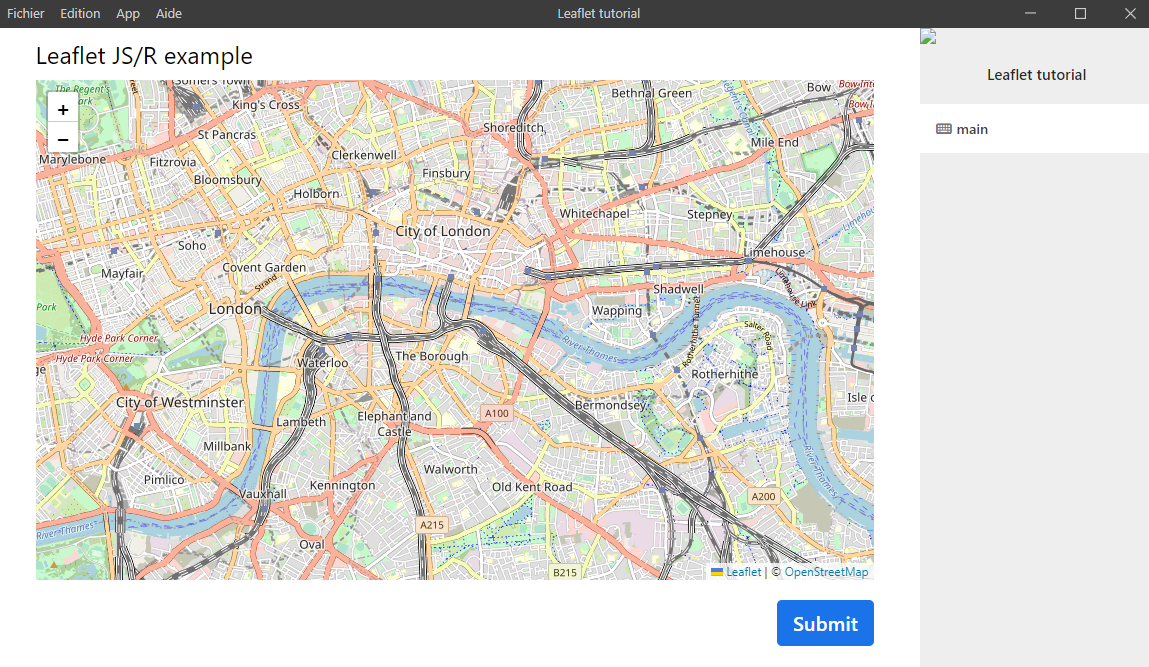
Export or launch the app and voilà !

You can now learn how to communicate between R and Javascript in the next tutorial.